Arduino简介
Arduino是一个开源硬件平台,简单易学,非常适合电子爱好者和初学者。
Arduino的优势
- 简单易用:C/C++语法,无需复杂配置
- 硬件开源:电路图公开,可自行制作
- 生态丰富:数千个库和示例
- 价格亲民:入门套件不到100元
硬件准备
必备硬件
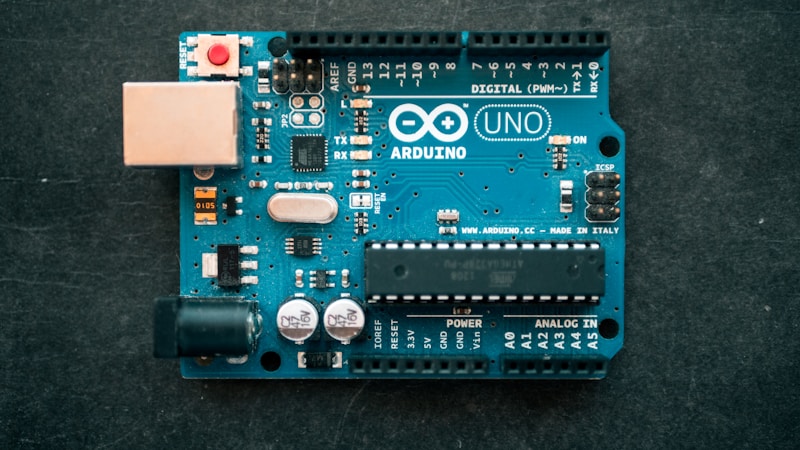
- Arduino Uno开发板
- USB数据线
- 面包板
- 跳线若干
- LED灯
- 电阻(220Ω)
可选传感器
- 超声波传感器(HC-SR04)
- 温湿度传感器(DHT11)
- 舵机(SG90)
- 蜂鸣器
环境搭建
安装Arduino IDE
- 官网下载:https://www.arduino.cc/en/software
- 安装并打开
- 选择开发板:工具 → 开发板 → Arduino Uno
- 选择端口:工具 → 端口 → COM3 (根据实际情况)
第一个程序:Blink
1
2
3
4
5
6
7
8
9
10
11
|
void setup() {
pinMode(LED_BUILTIN, OUTPUT);
}
void loop() {
digitalWrite(LED_BUILTIN, HIGH);
delay(1000);
digitalWrite(LED_BUILTIN, LOW);
delay(1000);
}
|
点击”上传”按钮,看到板载LED闪烁,恭喜你完成第一个程序!
基础语法
数据类型
1
2
3
4
5
| int count = 0;
float temperature = 25.5;
bool isOn = true;
char letter = 'A';
String name = "Arduino";
|
控制结构
1
2
3
4
5
6
7
8
9
10
11
12
13
14
15
16
17
|
if (temperature > 30) {
Serial.println("太热了!");
} else {
Serial.println("温度正常");
}
for (int i = 0; i < 10; i++) {
digitalWrite(LED_PIN, HIGH);
delay(100);
}
while (button_pressed) {
}
|
函数定义
1
2
3
4
5
6
7
8
9
10
11
12
| int add(int a, int b) {
return a + b;
}
void blinkLED(int pin, int times) {
for (int i = 0; i < times; i++) {
digitalWrite(pin, HIGH);
delay(500);
digitalWrite(pin, LOW);
delay(500);
}
}
|
数字输入输出
按钮控制LED
1
2
3
4
5
6
7
8
9
10
11
12
13
14
15
16
17
| const int buttonPin = 2;
const int ledPin = 13;
void setup() {
pinMode(buttonPin, INPUT);
pinMode(ledPin, OUTPUT);
}
void loop() {
int buttonState = digitalRead(buttonPin);
if (buttonState == HIGH) {
digitalWrite(ledPin, HIGH);
} else {
digitalWrite(ledPin, LOW);
}
}
|
模拟输入输出
读取光敏电阻
1
2
3
4
5
6
7
8
9
10
11
12
13
14
15
16
17
18
| const int lightPin = A0;
const int ledPin = 9;
void setup() {
pinMode(ledPin, OUTPUT);
Serial.begin(9600);
}
void loop() {
int lightValue = analogRead(lightPin);
int brightness = map(lightValue, 0, 1023, 0, 255);
analogWrite(ledPin, brightness);
Serial.print("Light: ");
Serial.println(lightValue);
delay(100);
}
|
串口通信
发送数据到电脑
1
2
3
4
5
6
7
8
9
10
11
12
13
14
| void setup() {
Serial.begin(9600);
}
void loop() {
Serial.println("Hello Arduino!");
int value = analogRead(A0);
Serial.print("Sensor value: ");
Serial.println(value);
delay(1000);
}
|
接收电脑指令
1
2
3
4
5
6
7
8
9
10
11
12
13
| void loop() {
if (Serial.available() > 0) {
char cmd = Serial.read();
if (cmd == '1') {
digitalWrite(LED_PIN, HIGH);
Serial.println("LED ON");
} else if (cmd == '0') {
digitalWrite(LED_PIN, LOW);
Serial.println("LED OFF");
}
}
}
|
常用传感器
超声波测距(HC-SR04)
1
2
3
4
5
6
7
8
9
10
11
12
13
14
15
16
17
18
19
20
21
22
23
24
25
26
27
28
| const int trigPin = 9;
const int echoPin = 10;
void setup() {
pinMode(trigPin, OUTPUT);
pinMode(echoPin, INPUT);
Serial.begin(9600);
}
float getDistance() {
digitalWrite(trigPin, LOW);
delayMicroseconds(2);
digitalWrite(trigPin, HIGH);
delayMicroseconds(10);
digitalWrite(trigPin, LOW);
long duration = pulseIn(echoPin, HIGH);
float distance = duration * 0.034 / 2;
return distance;
}
void loop() {
float dist = getDistance();
Serial.print("Distance: ");
Serial.print(dist);
Serial.println(" cm");
delay(500);
}
|
温湿度传感器(DHT11)
1
2
3
4
5
6
7
8
9
10
11
12
13
14
15
16
17
18
19
20
21
22
23
24
25
26
27
28
29
| #include <DHT.h>
#define DHTPIN 2
#define DHTTYPE DHT11
DHT dht(DHTPIN, DHTTYPE);
void setup() {
Serial.begin(9600);
dht.begin();
}
void loop() {
float h = dht.readHumidity();
float t = dht.readTemperature();
if (isnan(h) || isnan(t)) {
Serial.println("读取失败!");
return;
}
Serial.print("湿度: ");
Serial.print(h);
Serial.print(" %\t");
Serial.print("温度: ");
Serial.print(t);
Serial.println(" °C");
delay(2000);
}
|
舵机控制
1
2
3
4
5
6
7
8
9
10
11
12
13
14
15
16
17
18
19
20
| #include <Servo.h>
Servo myServo;
void setup() {
myServo.attach(9);
}
void loop() {
for (int pos = 0; pos <= 180; pos++) {
myServo.write(pos);
delay(15);
}
for (int pos = 180; pos >= 0; pos--) {
myServo.write(pos);
delay(15);
}
}
|
中断处理
1
2
3
4
5
6
7
8
9
10
11
12
13
14
15
16
17
| volatile int counter = 0;
void setup() {
Serial.begin(9600);
pinMode(2, INPUT_PULLUP);
attachInterrupt(digitalPinToInterrupt(2), countPulse, FALLING);
}
void countPulse() {
counter++;
}
void loop() {
Serial.print("Count: ");
Serial.println(counter);
delay(1000);
}
|
定时器应用
1
2
3
4
5
6
7
8
9
10
11
12
| unsigned long previousMillis = 0;
const long interval = 1000;
void loop() {
unsigned long currentMillis = millis();
if (currentMillis - previousMillis >= interval) {
previousMillis = currentMillis;
Serial.println("1 second passed");
}
}
|
综合项目:智能温控风扇
1
2
3
4
5
6
7
8
9
10
11
12
13
14
15
16
17
18
19
20
21
22
23
24
25
26
27
28
29
30
31
32
33
34
35
36
37
38
39
40
| #include <DHT.h>
#define DHTPIN 2
#define FAN_PIN 9
#define DHT_TYPE DHT11
DHT dht(DHTPIN, DHT_TYPE);
const float TEMP_THRESHOLD = 28.0;
void setup() {
Serial.begin(9600);
pinMode(FAN_PIN, OUTPUT);
dht.begin();
}
void loop() {
float temp = dht.readTemperature();
if (isnan(temp)) {
Serial.println("传感器读取失败!");
return;
}
Serial.print("温度: ");
Serial.print(temp);
Serial.println(" °C");
if (temp > TEMP_THRESHOLD) {
int speed = map(temp, TEMP_THRESHOLD, 40, 128, 255);
speed = constrain(speed, 128, 255);
analogWrite(FAN_PIN, speed);
Serial.println("风扇运行");
} else {
analogWrite(FAN_PIN, 0);
Serial.println("风扇停止");
}
delay(2000);
}
|
调试技巧
- 使用Serial监视器:实时查看变量值
- LED指示:用LED显示程序状态
- 分段测试:先测试单个模块再整合
- 检查接线:硬件问题占90%
常见错误
expected ';' before '}' → 缺少分号was not declared in this scope → 变量未声明does not name a type → 拼写错误或缺少头文件
进阶学习
- EEPROM存储:掉电保存数据
- 低功耗模式:延长电池寿命
- I2C/SPI通信:连接更多设备
- 无线通信:ESP8266/蓝牙模块
总结
Arduino让硬件编程变得简单有趣,从点亮LED到复杂的物联网项目,一切皆有可能。动手实践是最好的学习方式!
推荐资源: